
How to Set Up Assistive Access on iPhone: A Simple Guide for Seniors
How to Set Up Assistive Access on iPhone: A Simple Guide for Seniors
Hello friends! Today, I want to share some exciting news about a new feature in iOS 17 called Assistive Access. This feature is designed to make using your iPhone easier, especially if you need a bit more visual clarity. Let’s dive into how you can set up Assistive Access on your iPhone in a few simple steps.
Helpful photos to reference for steps. You can click arrows to scroll through:


Step 1: Begin Assistive Access Setup
- Open Settings: Tap the gray gear icon on your home screen.
- Navigate to Accessibility: Scroll down and select “Accessibility.”
- Find Assistive Access: Tap on “Assistive Access” and then choose “Set Up Assistive Access.”
- Continue Setup: Tap “Continue” to proceed.
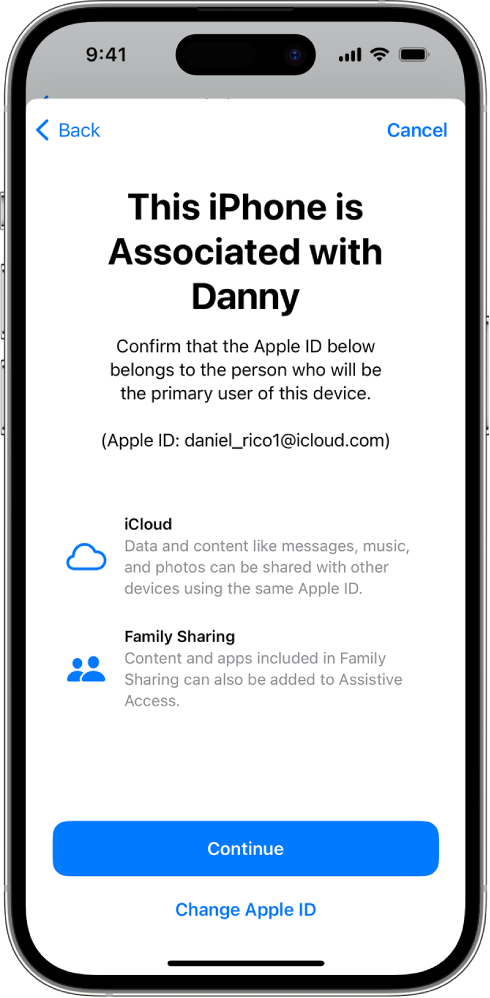
Step 2: Confirm Your Apple ID
- Check the Apple ID: Ensure the Apple ID displayed is the one that will be using Assistive Access.
- Change If Needed: If the Apple ID is incorrect, tap “Change Apple ID,” sign out, and log in with the correct Apple ID. If a new Apple ID is needed, create one.
Step 3: Select Your Layout
- Choose a Layout: Decide between ‘Rows’ for a list view or ‘Grid’ for larger icons. This will be the layout for your home screen and app items.
- Rows: Items are arranged in a readable list.
- Grid: Items are larger and organized in a grid emphasizing icons.
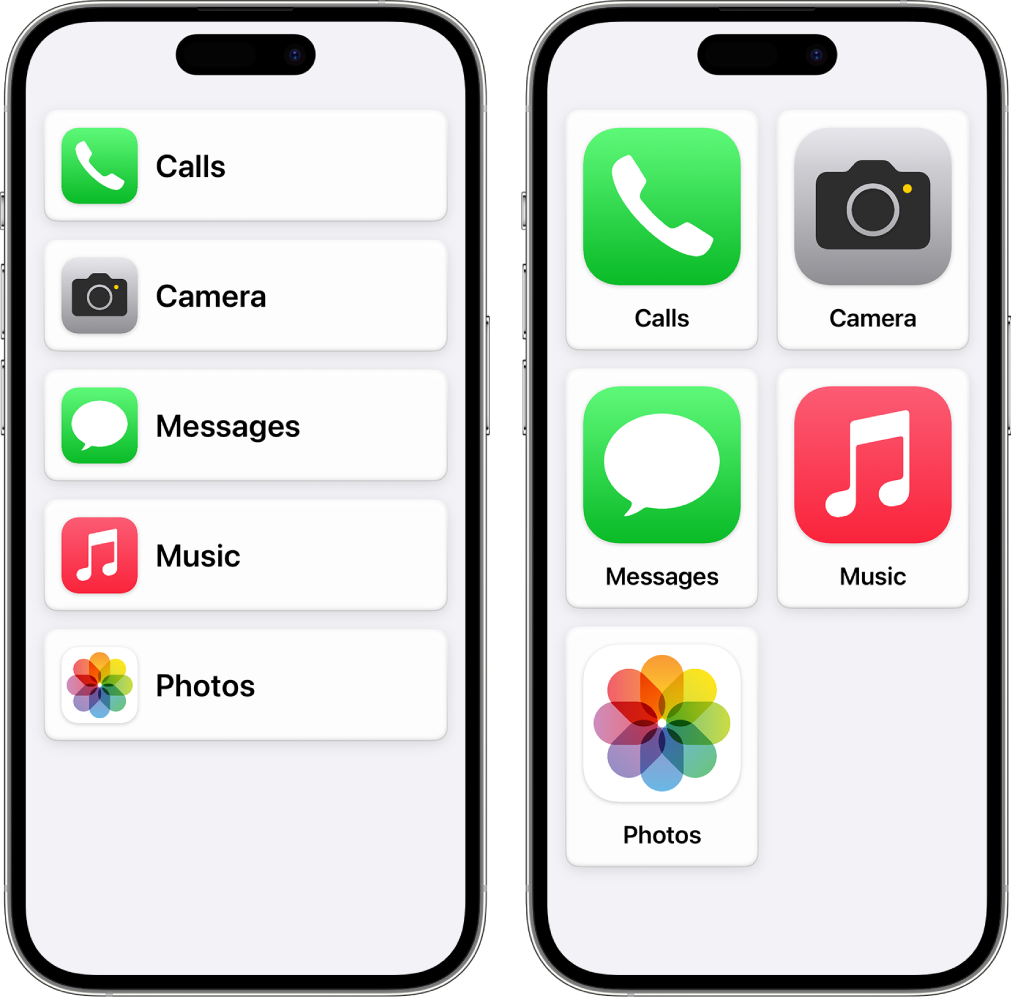
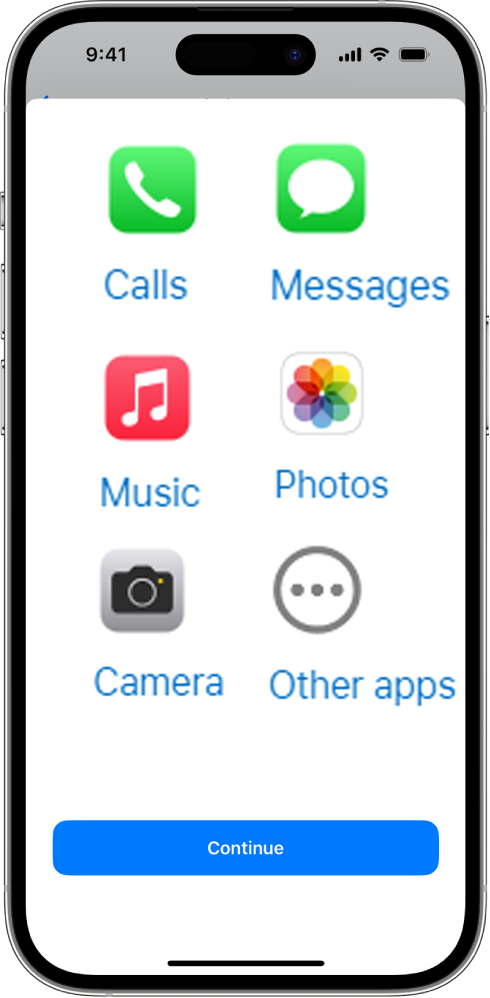
Step 4: Add and Customize Apps
- Select Apps: Add and customize the apps you want available in Assistive Access.
- Tap Add Button: Tap the “Add” button and choose your preferred options.
- Optimized Apps: Calls, Camera, Messages, Music, Photos, and other iOS apps.
- Customize Later: You can add, remove, and customize apps at any time.
Step 5: Verify Device Passcode
- Check Passcode Knowledge: Make sure the person using Assistive Access knows the device passcode.
- Set Up Face ID/Touch ID: Optionally set up Face ID or Touch ID for easier access.
- Change Security Settings: If needed, tap “Change Security Settings” to adjust the passcode, Face ID, or Touch ID.
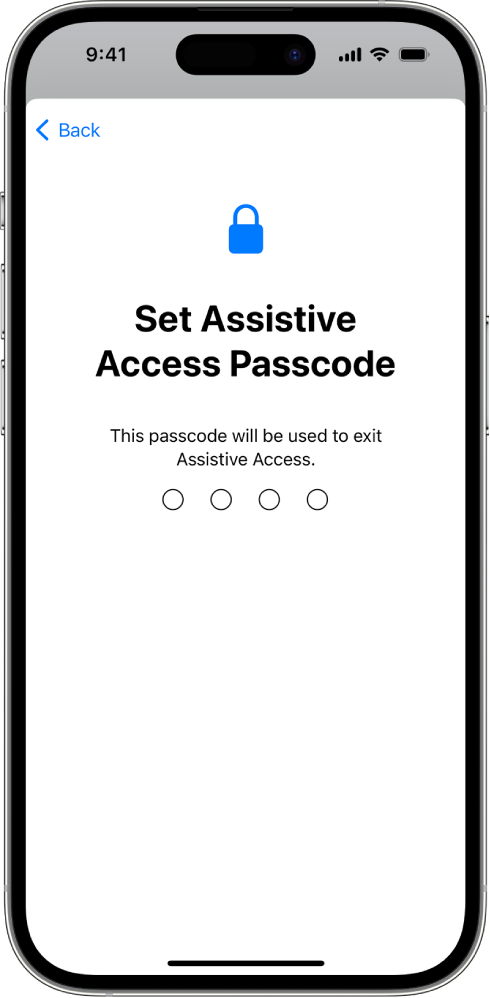
Step 6: Set the Assistive Access Passcode
- Create Passcode: Set a passcode for entering and exiting Assistive Access.
- Enter Apple ID: Provide your Apple ID and password to reset the passcode if forgotten. You can skip this step if you don’t have an Apple ID.
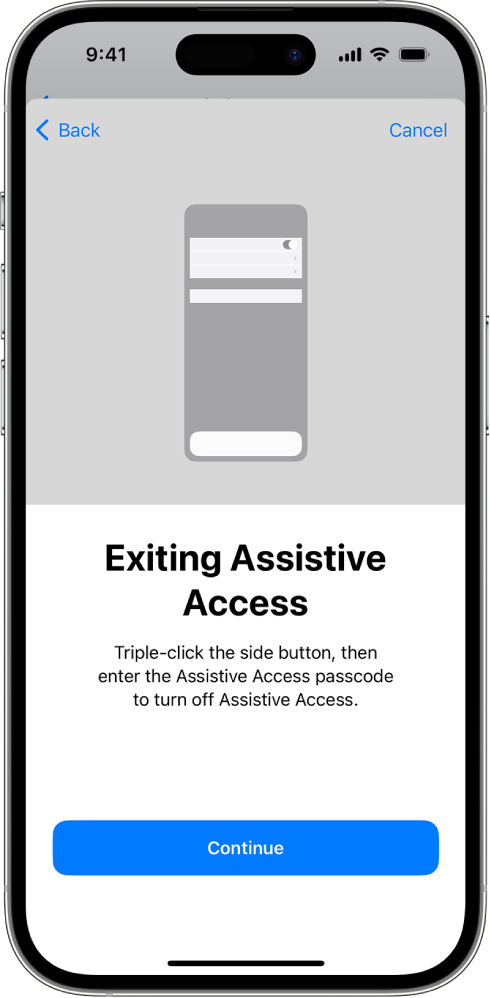
Step 7: Learn to Exit Assistive Access
- Exit Mode: Triple-click the side button (or Home button) and enter the Assistive Access passcode to exit at any time.
Step 8: Start Using Assistive Access
- Activate Mode: Tap “Start Using Assistive Access” and enter your passcode.
- Activate Later: To activate later, go to Settings > Accessibility > Assistive Access, tap “Start Assistive Access,” and enter your passcode.
Enjoying Assistive Access
Assistive Access on your iPhone is a wonderful way to simplify your digital experience, particularly if you prefer larger text and easy-to-navigate screens. This feature is perfect for seniors who wish to stay connected without the hassle of tiny icons or complex menus. Whether you’re making calls, sending messages, or browsing through your photos, Assistive Access makes every action easy and stress-free. It’s like having a personalized phone experience crafted just for you! Plus, with the help of a trusted family member or caregiver, setting it up is simple. They can assist you in selecting the best apps and settings to match your needs.
Don’t worry about getting lost in the details; once set up, using your iPhone will feel more intuitive than ever. So, why wait? Dive into the world of Assistive Access and rediscover the joy of using your iPhone with ease and confidence. Embrace this new feature to make technology work for you, not the other way around. Remember, your iPhone is here to help you, and with Assistive Access, it does just that in the most user-friendly way possible. Happy exploring, and enjoy the simpler, more accessible interface!
I’m Anita McIsaac, a 36-year-old bank teller from Kansas who enjoys managing SeniorsDeal.com in my spare time. Married with a 13-year-old son, I cherish family game nights and weekend soccer matches. My passion is helping seniors make informed choices, aiming to make retirement smoother and more enjoyable. I love connecting with our readers and sharing practical advice.


